Friday, September 17, 2010

Making Butter

Try this, it’s fun.

After taking my kids to the History Museum for Homeschool Day, I decided to try to incorporate what we learned into some fun projects. Thus was born my plan to make butter. I remember making butter in elementary school. We put cream in a jar and took turns rolling it around the classroom and finally we ate what amounted to thickened salty whipped cream on little crackers. Since that time, the creation of “real butter” had remained a mystery to me. After leavening the history museum we stopped at the store for some organic cream and bubble gum*. Then I did some quick internet research. Making butter seemed easy enough. I was really excited about the whole project and the kids were a little excited too. I mean not THAT excited since there was no sugar or video games involved but these days I take what I can get…..

Making Butter

You will need 2 quarts of organic cream (minimally pasteurized and non homogenized if possible) and a pinch of salt.

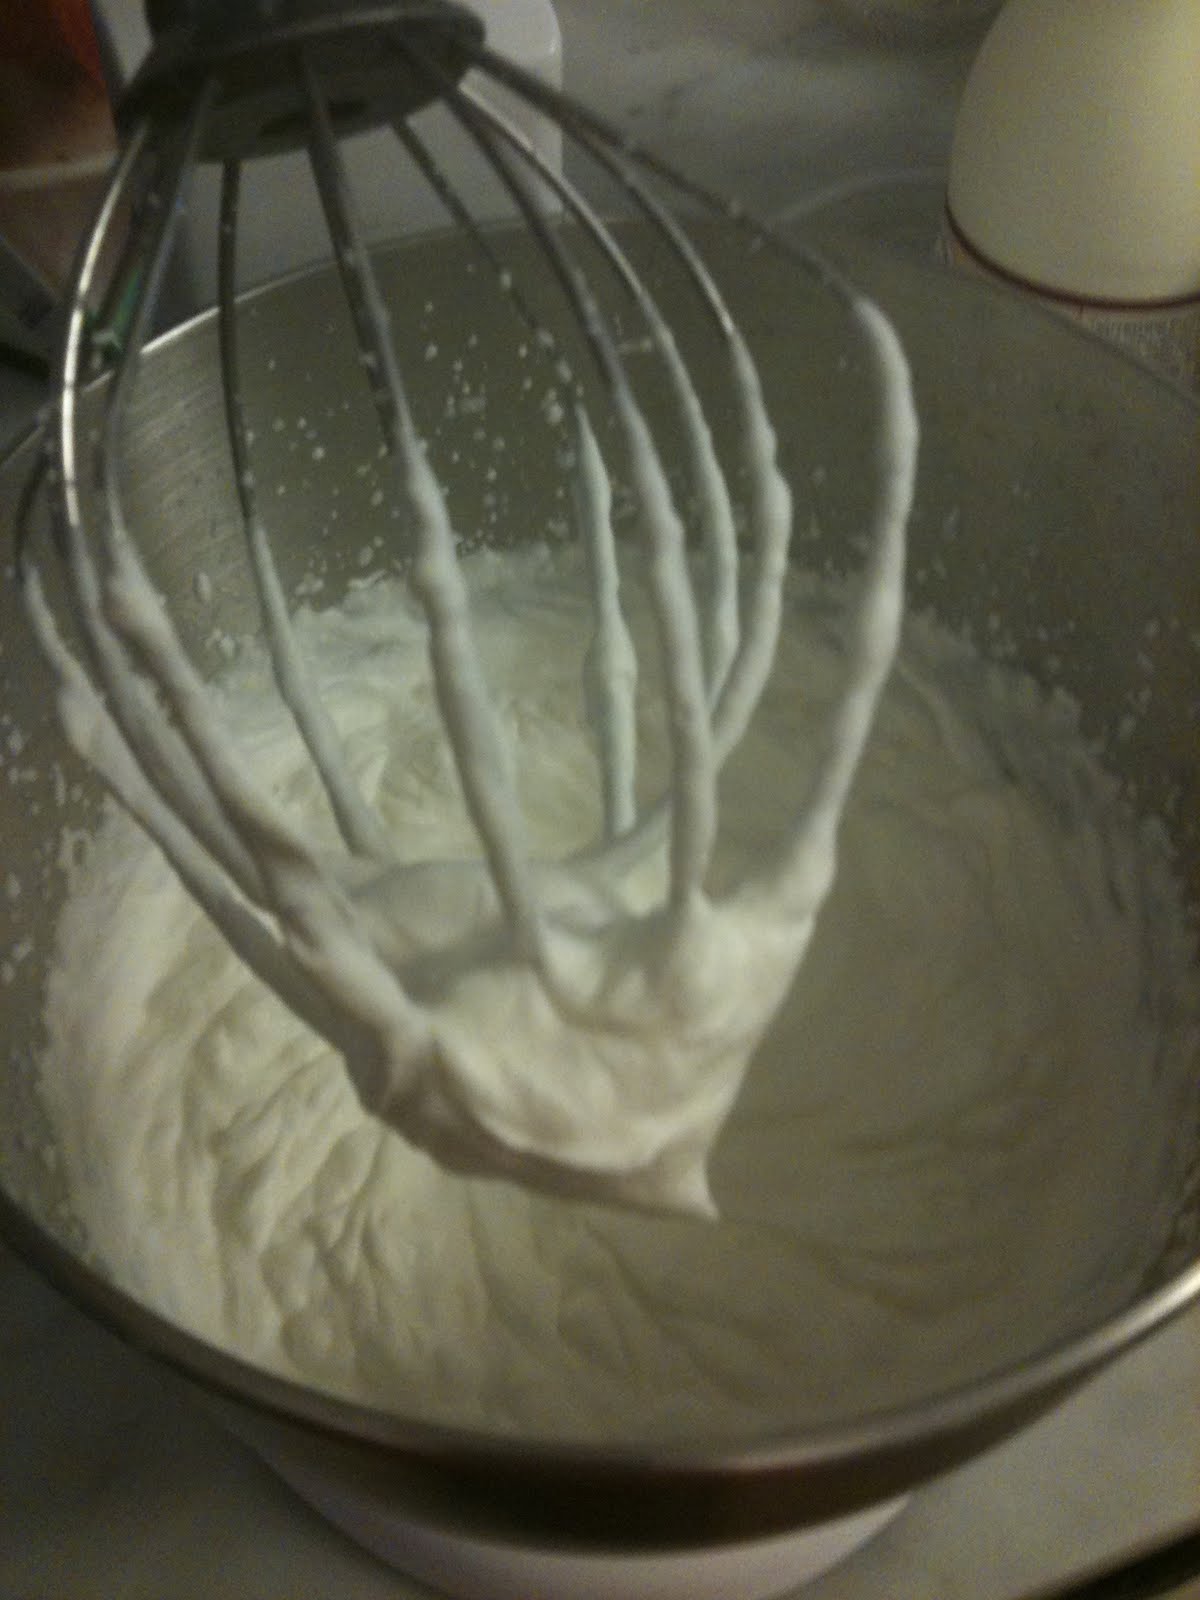
Place the cream into a mixing bowl and begin to beat/whip. I used my Kitchen Aid mixer and the whipping attachment. You can add the salt to taste at this point or at any point until the very end.

Start mixing the cream on high speed. At first you’ll essentially be making whipped cream. You will see the cream start to thicken and after a few moments it will stiffen. You may at this point, wish to plunge your face into the bowl because whipped cream looks just so freaking delicious, but remember we didn’t sweeten the cream, we added salt, so trust me…you really don’t want to taste it. Yes, I know that a guy on Top Chef used salted whipped cream during the finale of the show, but he didn't win did he.


Now the fun starts….or if you are a seven year old boy…the fun stops and you say “mom…can you just tell me when it’s ready”

So anyway, at this point the cream will start to break down but you won’t really see anything happen for a while. The cream no longer looks like whipped cream but more like melted ice cream. It will also get a little messy because it might start to splatter. AND let’s be honest this stage is a little boring and it might take a few minutes but don’t give up hope. Cover your mixer with a dish cloth to catch the splatters and wait.


Soon you will hear the sound of liquid hitting the cloth and suddenly you will hear a glop glop sound from the mixer. Take a look you will see chunks of butter clinging to the beaters. Beat for another few seconds and you have butter. The liquid left in the bowl is buttermilk-yeah REAL buttermilk. But you aren’t finished yet.


Using clean hands gather up all the chunks of butter from the bowl and beaters and then holding the clump of butter over a colander rinse and squeeze the butter under cold running water. You could also rinse your butter in a bowl of icy water. Either way you need to rinse the butter. As long as you don’t use HOT water your butter will hold together.

Now you can mold your butter. I just rolled mine in wax paper and cut it into small pieces. You might want to freeze the extra butter. Homemade butter won’t last nearly as long in the fridge as the stuff from the store. Just thaw as needed.

Comparing my butter, "real" butter, and farmers market butter (in the tub)


Cutting the butter into pieces


My actual new goal is to make butter from my raw milk….but separating cream is not as easy as you might think and after feeding two unsuccessful batches to the dogs…well I’m taking a break from raw milk butter making for a while.
Now to address a question my husband presented...Is it cheaper than organic butter from the store....well no. Is it healthier than organic butter from the store? Well it depends, if you can get pastured, non homogenized, lightly pasteurized cream-then yes, otherwise no.

But it is still cool to try just once. YUM!


*Bubble gum not necessary for making butter.
*Bubble gum may be necessary for appeasing children.

Sunday, May 9, 2010

Country Roads Take Me Home

I just came home from Haywood County, NC where my daughter and I attended a fabulous plant swap at the Lazy Dog Ranch, home of Shannon (my childhood friend) and her husband Karl and various dogs, cats, chickens and ducks. I am not sure who had more fun...but if I had to guess I'd say my daughter had the time of her life running around, playing with dogs, feeding chickens and generally running wild. I also came home with fresh scones, eggs, and 6 perennials from the swap. I’d call that a successful visit.

Shannon and Karl's lovely cabin.


A warm welcome from the garden gnomes


Shannon's plants ready to swap.


Waiting for a fist fight to break out over the orchid


"J's" new best friend Rupert


Looking toward the orchard


Looking toward the kitchen garden


Hill side flower garden


Mountain Vista


Lovely ladies


Thanks for the hospitality y'all

Friday, April 9, 2010

Spring Blooms-Tree Edition

I can't imagine anything prettier than spring. Even my yard looks nice. Let me share a few of my favorite spring blooms courtesy of the trees in my front yard.


Dogwood


Kwanzan Cherry


Red Bud


Dwarf Apple


Peach

Saturday, February 6, 2010

Bye Bye Kandinsky

Hello (knock off of) tribute to Ford Smith.

This sad Kandinsky print has been a staple in my home for years. I love it-I really do. But the print has been through a lot, not to mention that the frame wasn’t really the correct size for the print and the frame is a little thin for its scale.


About 6 months ago I found an awesome frame at Goodwill. Have I ever told you I love Goodwill? I do, I love it. The frame contained one genuine-God-awful-blue-and-white-floral-print. I immediately decided to buy the frame and paint over the print….But what to paint? Obviously I would copy something….because copying is what I do best. Ford Smith is a favorite artist of mine. So I chose this print to copy.


Gorgeous colors, modern, fabulous, did I mention it has gorgeous colors? I LOVE red and turquoise….watch the transformation.


"See ya" ugly flowers


I love cleaning my brushes in pretty little Mason Jars


Getting Closer


What happens when I neglect my household responsibilities to paint.


Just a reminder of what I was copying (for my own personal use of course)


The finished product-ready to hang.

Monday, February 1, 2010

Product Test-Leather Refinishing

Before our children were born we bought some very nice, expensive leather furniture. It didn’t seem expensive at the time. When two adults are working and have minimal expenses and no kids….buying aniline leather (no protective coatings) seems brilliant. And for two year we kept it in pristine condition….but now-after 2 kids, careless guests, dogs, cats, vomit….well you get the idea-our leather-while still in good stable condition (comfortable, not broken etc) looks like…well…it looks like crap. There is no other way to say it. I have spent a few years looking at various refinishing products on the internet and finally I decided to take the plunge. I ordered a small kit and decided to practice with the ottoman.


The kit included a leather cleaner, dye, and a protectant along with gloves a scrub pad and a sponge.


Here is an example of the sort of stains we are dealing with.


Step one is to use to scrub pad to gently rub the cleaner into the leather. This “cleaner” didn’t really clean the leather as in it didn’t remove and stains of spots, but rather it seems to remove any finish or coating and prepare the leather to take the dye.

The Next step was to “dye” the leather. I say “DYE” because the product more closely resembled watered down paint-not dye. I put some of the product on my hand and let it dry- I could easily wash or scrape off the “dye” and easy removal is not a typical trait of dye.

Here you can see that I have “dyed” part of the sample and left part the original color.


It takes several coats but eventually you build up enough color to cover any stains or spots on the leather. We used a color darker than the original leather, hoping for better results.


After about 4 coats I felt I had covered most of the stains.

When the “dye” was dry I added a protective coating-like a leather conditioner.


The finished job looks nice except we don’t like the color we picked.

I am also concerned-see the wrinkling in the leather when I push on it-the leather is no longer as supple as it once was. The leather also has gone from having beautiful natural variations to looking a little more like cheap leather or vinyl.


I can see where this product and process could be very beneficial. If you have on old piece of furniture that you won’t use often-this product can give you a good look-however after about 2 weeks of use-the ottoman shows many scratches and it seems as if some of the color is fading. I would rate this product 3 out of 5 stars. We are still deciding if we want to refinish all of our leather or learn to love the stains.

Wednesday, January 13, 2010

The Great Dog Sitter Debacle of 2009


I want to make this short.

Basically we decided to hire a house sitter to care for our dogs, cats, and frogs (yes we have frogs) and watch the house during a recent vacation. Usually we board the dogs and let the other animals fend for themselves. This time we were going to be gone a little longer than usual and getting a house sitter seemed to be the perfect solution. We hired a sweet college girl. A friend of a friend. A kid that seemed genuinely nice and responsible. We simply asked that she feed the dogs, let them out to potty, feed the other animals and hang out. We told her she was welcome to have a friend over to keep her company.

Note to self: you are NOT a good judge of character.

Ok-long story short. We return home. We call the sitter from the road and tell her we will be home between 5 and 6 pm. We tell her she can leave that afternoon after letting the dogs out. We pull into our driveway and 2 boys run out of the house with trash bags. We find a total of 6 kids in our house. There is the smell of marijuana and dog shit in my house. The trash is full of empty liquor bottles and marijuana ashes. There is dog poop all over my dining room, on the floor, the rug, the Christmas tree skirt, the drapes and on one present.

Oh how I cried. Oh how I scrubbed. One of my dogs hasn't slept in her bed (in our room) since we returned-almost 1 month ago.

So we think we may not go the dog sitter route again.

Canvas Floor Cloth

Floor Cloths were invented in France in the early 1400s, when painted oilcloths were used as decorative wall hangings and table coverings. They were introduced to North America in the 18th century.


In the early days, floor cloths were used to imitate the fine flooring found in fashionable homes. These cloths, often referred to as "crumb cloths" because of their use under dining room tables, were also used in parlors and hallways. They also made the floors warmer in the winter, and were used to cover the dirt floors of early Colonial America. Sails from ships were recycled as floor cloths and painted in bold designs. For several hundred years, these cloths were made and used in both rich and poor homes. It is said that George Washington listed a floor cloth valued at $14.82 in 1779 in a financial disclosure. While in office, Thomas Jefferson had a green painted canvas floor cloth in the dining room in the Whitehouse.

Until the invention of linoleum, these floor cloths were very popular throughout North America. Painted either free hand or using stencils, their washable and wearable finish made them a desirable addition to the home. By the early 1920s floor cloths virtually disappeared until hand-painted items came into style in the 1960s and they once again became popular.

My mom made dozens of floor cloths in the 80's. They were beautiful-but they were created before their time. No one in the 80's wanted anything like them. I remember the basement full of them-overlapping each other all over the floor. Like the general consumer (mom tried selling her rugs but never sold a single one) I didn't appreciate floor cloths back then. But people can change.

I made my first small canvas floor cloth about 14 years ago. It had a Christmas design and it still looks like new.


A few years later I painted a cloth in tribute of my cats. You wont believe what this rug has been through. I can tell you it has been scrubbed with abrasive cleanser, left outside for a month, tossed aside in the garage for years, and it sat under cat food dishes for years. I found it out in the garage to take this photo-it is filthy and I considered cleaning it to demonstrate how nice it could look-but I don't feel like cleaning ANYTHING today.


Here is a small floorcloth I painted to go by the back door-it's only purpose is to collect mud that the dogs track in. As you can see it is doing it's job very well.


I made a large canvas floor cloth two years ago to go under my dining room table. I never liked it. I always wanted to re-do it. So following the great house sitting debacle of 2009 I decided there was no time like the present.

I prepare my canvas using the least difficult method. I hot glue or sew the hem of canvas that I purchase from the fabric store. The I roll on a layer of primer-the same stuff you use to prime wood or bare walls. In this case I started with a cloth that had been previously painted. I scrubbed the old cloth, sanded it, then I added a coat of white primer.


Next I drew the design. In this case I used a diamond pattern with a mariners compass in the middle.


Now scoot everything out of the way so you can bake cookies. Did I mention I was painting on top of the stove...and don't my cookie sheets look cruddy...please don't judge me. I promise they are clean.


I began painting, first black


Next the red


Now the gold


A few coats of Primer


Almost finished


Finally after a few coats of primer the cloth goes under the table.